Dropbox: Certain Files Won’t Synchronize

Here’s a very interesting problem I encountered just last week. I was speaking to a colleague over the phone, and she told me that she had placed a particular document in a folder that we both shared on Dropbox. I looked into that folder, but was unable to locate the file that she spoke of. At that point, I realized that the Windows client really had no way of reporting whether it synchronized properly, or not. No matter what I did, the Dropbox client was convinced that everything was synchronized.

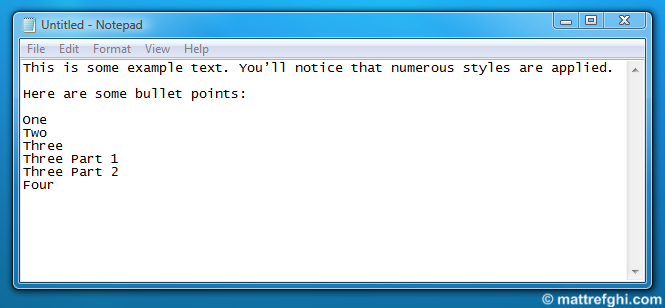
Since I wasn’t getting much information from the desktop client, I decided to log into the website. Surprisingly, the file was visible from the web interface – but it wasn’t appearing on my computer. Here’s what it looked like, roughly:

A word document titled "5E:Dolphins.docx" can be seen in the Dropbox web interface.

Notice anything… uncommon? It’s not often that I see colons in filenames, and so the sighting stood out to me. I then recalled that my colleague used a Mac, rather than a PC. I had a feeling that the colon character was invalid in Windows, and I decided to test my theory.

Solution

Sure enough, Windows blocked me from creating a text file with a colon in the filename, and it showed me the following message:

A filename cannot contain any of the following characters:
/ : * ? ” < > |

To fix the problem, I simply asked my colleague to remove the colon from the filename. As soon as she did, Dropbox downloaded the file to my computer, and all was well. It turns out that this problem is well documented on the Dropbox help site, and that they even created a tool that helps identify problem files.

In the end, I feel it is Dropbox’s responsibility to improve the way the client reacts to such problems. Without my background in Computer Science, I probably wouldn’t have discovered the source of the problem within a reasonable time. Unfortunately, it seems that the issue isn’t getting many votes within Dropbox’s suggestion forum. Let’s hope they decide to implement it anyway, to improve the quality of their service.

See Also

Dropbox Help: Why aren’t certain files on one computer syncing to another?

How to Pin a Batch File to the Taskbar in Windows 7

One of my favorite features in Windows 7 is the taskbar, as it combines the convenience of Vista’s Quick Launch, while organizing windows in a more intuitive manner. I’ve grown accustomed to dragging program shortcuts into it, and having them remain there permanently. That is, until this morning. For some reason, I discovered that Windows wouldn’t let me drag a batch file to the taskbar.

In DOS, OS/2, and Microsoft Windows, batch file is the name given to a type of script file, a text file containing a series of commands to be executed by the command interpreter.

Even when I right-clicked the file, I didn’t see the typical “Pin to Taskbar” shortcut. Seeing as batch scripts can execute programs within themselves, I was surprised they were being blocked. After running a few web searches, I found a solution to the problem, and felt it would be worthwhile to share it here.

For the sake of this tutorial, let’s assume that we’re trying to pin a batch file titled “myscript.bat” to the taskbar. Since we can’t pin it directly, we’ll be using a trick that involves the Windows Command Prompt. Here’s how to do it:

A Command Prompt window with the Target field in view. It has the addition discussed in this tutorial.

  1. Click the Start button.
  2. Start typing “Command Prompt” in the search box.
  3. Right-click Command Prompt once it appears in the search results, and select Pin to Taskbar.
  4. While holding SHIFT, right-click the black Command Prompt icon in the taskbar.
  5. Select Properties from the context menu that appeared.

Now we bring our attention to the value in the Target field:

%windir%system32cmd.exe

As it stands, it’s just trying to launch the executable that will make the Command Prompt window appear. For our trick to work, we must add the follow text, in bold:

%windir%system32cmd.exe /c “c:somewheremyscript.bat”

The “/c” parameter tells “cmd.exe” that it should only run the command provided, and then immediately close itself. In this case, we’re telling it to launch a batch file, and that file can run any number of commands within itself. The path, naturally, should reflect the actual location of the file on your machine.

Once this is set up, we can simply click the black Command Prompt icon to launch our script. I have no idea if Microsoft plans to improve support for such files, but in the meantime, I consider this a decent workaround.

Distraction-Free Writing in WordPress 3.2

As a fan of WordPress, as soon as 3.2 was released, I found myself reading the changelog. While doing so, I noticed a very intriguing feature addition:

Start writing your first post in our redesigned post editor and venture to the full-screen button in the editing toolbar to enter the new distraction-free writing or zen mode, my personal favorite feature of the release

Zen mode? Distraction-free writing? Sounded good, so I proceeded to update all my WordPress installations. To fully impress upon you how significant of a feature it is, here’s what the typical WordPress WYSIWYG editor looks like:

The standard editor within WordPress offers plenty of controls, making it a very busy-looking page.

It’s a full-featured page, that’s for sure – but it also has quite a lot of controls surrounding it. The text editor itself loses some screen space to these controls, even vertically – requiring a scrollbar. I often find myself resizing the editor by dragging the bottom right corner, until I have the maximum vertical space available to me. While this works, WordPress does not actually remember my preferences, forcing me to manually resize whenever I’m working on a post.

Now, with all that said, take a look at full-screen mode:

Full-screen mode has a main toolbar, and not much else.

Full-screen mode is a highly simplified version of the regular WordPress editor. All you really have is the toolbar at the top, subtle outlines of your title and content sections, and a lot of free space.

Then, two seconds later:

If you wait a few seconds, or start typing - the little UI that exists will actually disappear.

The controls disappear, making it so only the content is visible. When this originally happened, it was a bit of a shock to me, as I realized that having the full WordPress interface around the content (as I typed) gave me some re-assurance. It kept telling me when it auto-saved, the word count, stuff like that. But in this new mode, I seemed to be on my own – what if I accidentally navigated away? I barely felt like I was in WordPress anymore – it almost looked like completely different application. It’s at this point that I tweeted a message to @wordpress:

@wordpress Good job guys, I really like the new dashboard design. Full-screen editor will take some getting used to, though – but it’s nice.

After writing that, I stepped away from the editor, and only returned to it a few days later – when it was time to write a blog post. It’s at that point that began to see how useful it was. The toolbar appears whenever you hover your mouse towards the top of the page, no matter how much you’ve scrolled. The same cannot be said about the regular editing mode, so this is a definite improvement. If I accidentally press Back in my browser, I get the usual warning that I might lose information – and I can cancel it. So, there’s really no need to worry about navigating away.

The word count and slogan are visible right after the post content.The other features I mentioned, namely, the auto-saving and the word count, are still accessible from this new editor. You can save whenever you want by making the toolbar appear, and click Save. I’m not sure it actually saves automatically, but I find it instinctual to save manually, so at least for now, this isn’t a problem. The word count can be found at the bottom of the page, right after the content. It’s at that location that you can also see a slogan, which says, quite simply, “Just write.” I really like this, as I feel it truly sums up the spirit of this new feature – it is meant to block out all excess interface noise, and let you write, distraction-free.

At this point in time, I exclusively use the full-screen editor when working on my posts. It’s a very refreshing feeling, having just my content to work with – and I commend the WordPress devs for adding such a feature.

Internet Explorer 9: Large Blue Bar in Gmail

Immediately after updating Internet Explorer to version 9, I noticed a pretty severe bug within Gmail. A huge blue bar appeared, forcing all the buttons to appear on individual lines. Furthermore, despite the fact that I had one e-mail in the inbox, the graphical issues may it impossible to see. With the problem only existing in IE9, and not in my other browsers, I began searching for a solution.

A giant blue bar can be seen obstructing the Gmail interface.

Solution

A Gmail Help article revealed that the problem originated from my Compatibility View settings:

Internet Explorer has a Compatibility View, a feature that affects how some websites are displayed. If Compatibility View is enabled for google.com, it may cause some Gmail features to display incorrectly. So, we suggest that you remove google.com from your list of sites that have Compatibility View enabled to ensure that Gmail displays correctly. To do this, follow the steps below:

  1. Right-click on the gear icon in the upper right hand corner.
  2. Select Command bar.
  3. Open the Tools menu near the top of your browser and select Compatibility View Settings.
  4. Select ‘google.com’ under ‘Websites you’ve added to Compatibility View’.
  5. Click Remove.

Source

Gmail Help – Using Internet Explorer with Compatibility View enabled


Remote Desktop: A Device Attached to the System is not Functioning

Every now and then, when I attempt to connect to my work machine using Remote Desktop, I encounter the following error:

A device attached to the system is not functioning.

Considering I have no special devices plugged in at work, the message always comes as a surprise. Multiple attempts to connect will simply result in the same message, forever blocking the connection.

Solution

Though I haven’t had the chance to try it, commenter “Rahim786” seems to have found a better solution:

“1) Kill explorer of that session

2) now you will be able to connect to this session

3) Press Ctrl + Shift + Esc to launch Task Manager

4) Click new task and run Explorer again”

Thanks, Rahim786!

Other Potential Solution

The solution I found involves using Remote Desktop to connect to another machine at my work, and using that machine to resolve the problem. Let’s say PRIMARY is my primary work machine, and SECONDARY is a secondary machine I can access from home.

Here’s what I do to resolve the error:

  1. Log into SECONDARY with Remote Desktop, from my home machine.
  2. From within SECONDARY , I launch Remote Desktop again, and connect to PRIMARY.
  3. From within PRIMARY, I click Start > Log off, which will log off the user, and ultimately disconnect my Remote Desktop session.
  4. With the PRIMARY connection closed, I simply disconnect from SECONDARY using my home machine.

Once those steps are completed, I’m usually able to connect to PRIMARY directly from my home machine, without seeing the error. It seems that it has something to do with the user session, perhaps also combined with the operating system you are using to connect. If you can’t connect to SECONDARY, consider finding an alternative with an older operating system. In my case, SECONDARY ran Windows Server 2003, while PRIMARY ran Windows Vista Business.

IE8 Developer Tools Debugger Stuck Off-Screen

As a frequent user of the built-in Internet Explorer 8 debugger, I was particularly annoyed when it suddenly started to appear off-screen. As you’ll see below, the debugger window itself was nowhere to be seen, whereas the actual “JScript Debugger” balloon tip remained visible.

JScript Debugger window has disappeared from sight. Balloon tip shows text: "Breaking on JScript runtime error".

Amusingly enough, the balloon was pointing up, suggesting that my missing window was in that direction. I hoped it would stop happening after a reboot, but unfortunately, this was not the case.  To make matters worse, trying to killing the process wasn’t easy, as it often took a good two minutes for the kill command to take effect. I believe this was because the process was in a debug state, rather than running as normal.

Solution

After dealing with this problem for a few weeks, I eventually showed the behavior to a co-worker, François. Upon seeing it, he suggested I try moving the window through the Windows context options, and sure enough, that worked.

Below are the necessary steps:

  1. Right-click the “Developer Tools” window in the taskbar.
  2. Select the “Move” option.
  3. Press the one of the arrow keys. (This should make the Developer Tools window appear directly under your mouse cursor.)
  4. Move the mouse until you can see the “Developer Tools” window completely.
  5. Left-click to stop the “Move” operation.

After following those steps, my Developer Tools window returned to the real world.

Thanks to François

Accessing the Menu Bar in Windows Vista and Windows 7

Before the introduction of Vista, Windows always featured a menu bar in Windows Explorer. It offered the following menu options: File, Edit, View, Favorites, Tools, and Help. Below is a screenshot of the bar in Windows Server 2003:

Windows Explorer interface in Windows Server 2003

Since Vista, Microsoft has decided to hide the bar, by default. In Windows 7, here’s what Windows Explorer looks like:

Windows Explorer interface in Windows 7

While the menu bar is no longer visible, it hasn’t been completely removed from the operating system. You can simply press ALT to make it appear. Once visible, it is designed to disappear whenever you left-click the Windows Explorer window. If you actually click the menu, you can execute one action, and then the bar will disappear again. In this manner, Windows ensures that the menu bar is never left to waste window space. Here’s a video illustrating this behavior:

I really like this approach, and actually found that other applications feature the same logic. For example, Internet Explorer 8, Windows Live Messenger, and Firefox 4 Beta 1 also show/hide the menu bar whenever ALT is pressed. I’m hoping it becomes a global standard for applications.

You also have the option of permanently showing menus… an option I don’t personally like. If you want to try that option, follow these steps:

  1. Click Organize > Folder and search options in Windows Explorer.
  2. In the Folder Options dialog, click the View tab.
  3. In the Advanced Settings section, you’ll find an option titled Always show menus. Enable the checkbox.
  4. Click OK.

Pear: “go-pear.phar” Does Not Have a Signature

As I was trying to install Pear for my WampServer 2.0i installation today, I encountered a problem. When I ran the typical “go-pear.bat” script – I was hit with this message:

phar "C:wampbinphpphp5.3.0PEARgo-pear.phar" does not have a signaturePHP W arning:  require_once(phar://go-pear.phar/index.php): failed to open stream: pha r error: invalid url or non-existent phar "phar://go-pear.phar/index.php" in C: wampbinphpphp5.3.0PEARgo-pear.phar on line 1236

Solution

Thankfully, after searching around – I found the solution from a blogger named Latyr, who blogs in French. Since I speak French, I thought I should offer his solution in English. I expanded it into a few steps, for those that aren’t familiar with WAMP and PHP.

1) Locate the “php.ini” file.  In my case, I found it at this path:

C:wampbinphpphp5.3.0php.ini

Don’t use the WAMP system tray icon to edit this file. It didn’t work when I tried – you have to manually locate it.

2) Find the following line, in bold:

; http://php.net/phar.require-hash
;phar.require_hash = On

; http://php.net/phar.require-hash

;phar.require_hash = On

3) Uncomment the “;phar.require_hash = On”line by removing the semi-colon.

4) Change “On” to “Off”.

; http://php.net/phar.require-hash

phar.require_hash = Off

5) Save the file.

After I performed those steps, “go-pear.bat”  began working normally again.

In case you’re wondering about  the phar.require_hash option we just disabled, here’s the php.net description:

This option will force all opened Phar archives to contain some kind of signature (currently MD5, SHA1, SHA256 and SHA512 are supported), and will refuse to process any Phar archive that does not contain a signature.

See Also

The solution offered here was made possible by Latyr’s original blog post, entitled “Bug dans PHP5.3.0 Pear.bat”.

UPDATE January 8, 2023 – Old comments posted to my previous site can be seen here.

Notepad++: “nppcm.dll needs to be in the same directory than notepad++.exe”

In the last few weeks, I’ve been having problems launching Notepad++ from the context menu as I usually do. Instead of it launching properly after I select the “Edit with Notepad++” option, I get an error:

Notepad++ error dialog showing the message "Error creating process: nppcm.dll needs to be in the same directory than notepad++.exe"

To get around the error, I had to use the File-Open menu from Notepad++, and locate the file I wanted to open. This was acceptable for a while, but eventually my patience with the issue wore thin.

Solution

I figured out why it was happening. The problem was that the “notepad++.exe” file was set to automatically prompt for administrative privileges via User Account Control. This works fine if you’re launching Notepad++ from a start menu or desktop shortcut, but apparently the context menu didn’t like the setting.

To “fix” this problem, remove the automatic UAC prompt from the Notepad++ shortcut/executable. This restores the context menu option to working order. Matt, what if it needs administrative privileges, you say? Well, as far as I know, the only feature that actually needs administrative privileges is the Update feature. This means you’ll have to launch Notepad++ with administrative privileges manually whenever you want to check for updates, which isn’t great… but at least the above error is no longer an issue.

If that doesn’t work for you, I’ve heard of others that solved this issue by deleting a mysterious extension-lacking “Program” file in their hard-drive root; however, the file didn’t exist on my system. Given how out-right bizarre this file sounds, I would highly recommend you avoid taking that approach – it just doesn’t sound right. I don’t see why Notepad++ would save a file in the root – and if they are going to do so, why name it in such a generic fashion? In any case, if any of you spot this file… please let me know what it contains.

Update: Many thanks to Bram, who wrote a comment about encountering  the “Program” file:

“I had the same problem here, and I also had the file called ‘Program’ in the root folder. That file was 0 KB, so completely empty. It’s not guaranteed that notepad++ somehow creates this file. Anyways, after rebooting the machine, my Windows Server 2003 came up with a warning that there was a file called program in the root which may cause other programs to function incorrectly bla bla bla. Renaming into Program1 solves the issue, and so does deleting the file completely.”

Converting Formatted Text from the Clipboard to Plain Text

Usually when I copy text from web pages, I really don’t want the formatting from the webpage to be kept. I  just want to have the text in the simplest format possible, and then I can set my own styles. Unfortunately, this isn’t normally how it works. Typically, when copying from a web page in a browser, it may also copy any tables, images, and styles that are applied to or mixed with the text. This does depend on where you are pasting the text, though. In my case, I use Microsoft Word most of the time. Word supports a lot of web page elements, meaning they will likely appear in the Word document.

Consider the following text:

This is some example text. You’ll notice that numerous styles are appliedwarning

Here are some bullet points:

  • One
  • Two
  • Three
    • Three Part 1
    • Three Part 2
  • Four

If I wanted to copy that text to Microsoft Word, here is what I’d see:

pastedtoword

The formatting is mostly intact. What if you didn’t want that? What if you just wanted plain text, and you wanted to choose your own styles from scratch? There is one way to do it from within Word (click the wordbutton1 button for these options), but I’ll show you how to do it without such a  feature. To achieve this, I paste the text into Notepad. Yes, Notepad – the simple text editor provided by Windows. Here’s what the text will look like, once pasted:

Notepad will remove formatting from any text you paste into it.

Notice how the image is gone, and all the styles are removed? Now you can copy this text instead, and paste it in Word:

pastedtowordplaintext

No more styles, bullets, or image. You can now style it exactly as you want, without having to start off with the same formatting as the web page. This isn’t, perfect, though – you may have to make corrections to the plain text copy in Notepad, as the removal of the formatting sometimes leaves the text with improper indentation.

I’ve used this little trick in a few different scenarios. Here’s an example: Sometimes I include a quote from a website in my e-mails. The default format for my e-mails is rich text, but when I include something from another source, I really don’t care about formatting – I’ll set my own formatting to suit my e-mail. If I just copy paste the quote into my e-mail, it will include the formatting – this usually ruins the look of my e-mail. To prevent this, what I do first is use Notepad to destroy the formatting, and then paste the plain-text version into my e-mail.