Measuring Those Pixels

Ever needed to measure the distance between two HTML elements, without achieving it through code?

I found a tool a while ago that allowed me to do just that; it was, essentially, a virtual ruler. Called Pixel Ruler, this free application makes a ruler appear on your screen. You can place it anywhere you want, horizontally or vertically, and use it to measure pretty much anything. It is a little buggy at times, but I still recommend you give it a try.

Using Ping to Monitor Reboots

When you’re rebooting a computer, and you need to know exactly when it is back online, try using this command:

ping -t <target>

<target> can be an IP or domain name.

This command will keep pinging the machine endlessly, which can reveal exactly when the computer is back on the network. As long as you keep getting “Request time out”, the machine isn’t online yet. When you get a reply, as illustrated below, you know you can connect to the machine.

Personally, I tend to put this window on my secondary monitor, while I continue working on the primary monitor.  As soon as the machine is online, I close the window or press CTRL+C to prevent the ping from going on endlessly. Be careful how you use this – some hosts can interpret endless pinging as an attack.

Thanks to François Deschênes for originally showing me this trick.

Screen Capture Tools and the Evasive Mouse Cursor

So, here’s the thing:  I was taking screenshots for another article, and then I noticed that the cursor was not present in them – and I needed it to be. I’ve used Print Screen for a long time now, and I never really needed the cursor to appear. Whenever I did need to have it the screenshot, it was for work – and there, we have Snagit, which has an option to show the cursor. While SnagIt is a great application, I wasn’t ready to buy a license for home use just yet. I wanted to look for free tools first… so I began my search. I found out a couple interesting applications along the way.

Snipping Tool (Windows Vista only)

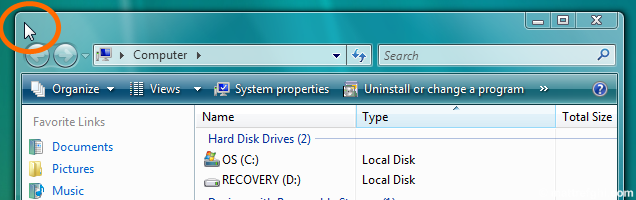
I was surprised to discover a new screen capture tool from Microsoft, already preloaded on my Vista machine… sounded cool. When you run it, it grays out the screen, and the interface pops up:

You can then drag the cursor and select an area to capture. It even has “free-form”, “rectangular”, “full-screen”, and “window” selection modes.

Whatever you select is then presented to you, and you have the option of saving it in a number of formats. Not bad, Microsoft, not bad. Unfortunately, there is no way to capture the cursor. I was starting to wonder if this was particularly difficult to achieve. I found a webpage that mentions the following:

Because of the way graphic interfaces work, your cursor usually isn’t captured in an image. Pressing the Print Screen key will not capture your cursor. But all commercial programs that do captures do have some kind of option to capture the cursor.

But there’s a trick—screen capture programs can’t really see the cursor, either. So what they must do is add their own special cursor, and because cursors change shape, if you want a special cursor, you need to tell the program what cursor to capture. Each program has its own way to do this.

Funny thing is, I had that approach in mind – achieving it via image manipulation, but I wanted to avoid it, since it isn’t a convenient long-term solution. Reading what he had to say really made me want to know how the cursor works altogether – why is it so different? I’ll take some time to look into that, and will write a post about it afterwards. For now, back to the tools:

Jing

Jing is actually from TechSmith, the same guys that make SnagIt. Interestingly, they have a free version to offer. I found the interface particularly unique, unlike anything I’ve seen before.  It features a “sun” icon that you can place anywhere on the outer bounds of your screen. Once placed, when you hover over the icon, it expands to show you more controls, as seen here:

To get a better idea of what the application really looks like, check out their entertaining intro video.  Put simply, Jing allows you to capture part or all of your desktop as either an image or a video. It then gives you options to annotate, and all-that; but he’s the cool part. You can automatically upload your recorded videos (which include audio) to a website, which then allows you to easily share it via a link.

Unfortunately for me, Jing’s screenshot functionality didn’t include the mouse cursor. After discovering this, with yet another application, an interesting idea popped into my head. Surely, the video feature would feature the mouse cursor – otherwise the video feature would be pretty useless. I tested my theory, and I was right. So, theoretically, I could take a screenshot of a video, and then I’d have the mouse cursor captured as well. Sneaky, I know – but it did the trick.

So, all-in-all, I didn’t find a tool that did exactly what I wanted, but the “take a screenshot of the video” idea was actually easy enough to do – so I’ll probably use that approach whenever necessary; that is, until I give in to SnagIt.

Another Way to Close Windows

A couple of years ago, I discovered a new way to close windows in Microsoft Windows. To be fair, I didn’t discover it on my own – I saw a colleague of mine using the alternate approach, and I asked her about it. I was surprised that although I had used various Microsoft operating systems (95, XP, 2000, 2003), that particular trick eluded me.

Here’s how it works. You know how you can normally close a window by clicking on the top right corner? The “X” button? Well, you can also double-click on the top left corner, and this will usually also close the window.

The reason I say “usually” is because some newer applications, like Google Chrome, for example – are not using the conventional windows style. Aside from a few exceptions, I’ve seen this work across XP, Server 2000, Server 2003, and Vista operating systems. It’s just a little weird in Vista, seeing as they don’t display the icon in the top left corner like they used to. 

Single-clicking the top left corner actually brings up a menu:

My guess is that Windows will automatically execute the action written in bold when you double-click, which is Close.

A little research revealed that this feature was initially the only way to close a window in Windows 3.1. Jensen Harris, Group Program Manager of the Microsoft Office User Experience Team, explained it on his blog:

Anyway, in Windows 95 the close box was added to the upper-right corner, but they kept the ability to close windows by double-clicking the product icon on the left side of the title bar. As a result, even some whippersnappers like me who barely remember computers pre-Windows 95 learned to close windows that way.

Whoops, I let out my big secret.

You see, I’m a left-side double-click closer myself. It’s embarrassing, I know, but I just can’t break the habit. Oh so many times during the beta of Office I’ve moved my mouse to the upper-left corner, realized that I couldn’t close the window, and then jumped to the other side of the screen to hit the close box.

We removed left-side close as a planned experiment. If people could get used to closing on the right side, we’d be better off because there wouldn’t be two ways of doing the same simple action. Clearly if we were building a new window manager from scratch with no pre-existing users, we would only have one way to close windows.

But, of course, we have hundreds of millions of users, many of which (like me) literally have left-side close burned into the lower levels of our brain stem, along with breathing and keeping the heart beating. Honestly, I can seem to relearn anything except for this.

Nonetheless, we tried taking this out–we shipped Beta 1 Technical Refresh and Beta 2 this way and waited for feedback. Could people adapt? Not really, as it turns out.

Honestly, we knew all along that there was a strong possibility we would have to find a way to add this functionality back. It was worth a shot, but in the end, creating an affordance for left-side closing eliminates one huge annoyance that stands in the way of some people’s enjoyment of the product.

Like Harris, I too feel like I’m hanging on to an old habit. In Windows Vista, I see that Microsoft is no longer including an icon in that corner in some core places – that, to me, communicates their intention to discourage widespread use of the feature. After all, why would we want multiple ways to close a window with the mouse?

Internet Explorer … provided by Dell?

When I first received my laptop from Dell, I quickly noticed something different in Internet Explorer:

providedbydell_titlebar

Apparently, my copy of Internet Explorer was provided by Dell. I immediately disliked the idea that this reminder would be present every time I used Internet Explorer. I began looking for a way to remove it, and it turned out to be pretty simple. All you need to do is change a registry key, located here:

HKEY_CURRENT_USER/Software/Microsoft/Internet Explorer/Main

and depicted here:

providedbydell-regedit

Solution

warning Some of the instructions found in this article involve modifying the Windows registry. If modified incorrectly, serious problems may occur. It is highly recommended by both the author of this article, and by Microsoft – that you back up the registry before you modify it. For information on how to do this, please see the following Microsoft Knowledge article:

MSKB 322756 –  How to back up and restore the registry in Windows.

To remove the Dell branding, all you need to do is:

  1. Click Start – Run (or press Windows Key + R). Type regedit.exe in the “Run” dialog, and press Enter.
  2. Navigate to “HKEY_CURRENT_USERSoftwareMicrosoftInternet ExplorerMain” using the Registry Editor.
  3. Right-click the “Window Title” key.
  4. Select “Modify”.
  5. Select the “provided by Dell” text in the “Value Data” textbox, and press Delete.
  6. Click OK.
  7. Close and re-open Internet Explorer.

If you would prefer a quicker way, and have Windows Vista, you can download and execute this registry file: remove-dell-branding-in-ie7-titlebar.reg (right-click, save link/target as) Executing this file will change the window title automatically. Keep in mind, I only tested it with a system that is running Windows Vista and Internet Explorer 7. Using this file in a different environment is discouraged. See Also MSKB 176497 – How to Change the Internet Explorer Window Title