Hi everybody. Today I’ll be showing you what to do when you encounter a window in Windows that is stuck offscreen. And by that I mean you can’t actually open it, but you do see it in the taskbar. So no matter what you do, you can’t actually make it pop up.
All you have to do is hold shift over the taskbar icon, and then right-click, and here you’ll have some options. The option you’re interested in is Move, second one from the top. So you click move, and as soon as you’ve done that, you can kind of, like, let go of the mouse and keyboard. You should press one of the arrow keys, doesn’t matter which one, in this case I’m gonna press Right. Look at that! That made this window pop out of nowhere, okay? And in certain cases, pressing the arrow key is not enough, the window will still be off-screen after you’ve done that. But what you do is then move the mouse. So after pressing an arrow key, move the mouse. And you’ll notice that the mouse, or rather the window follows the mouse. So that’s the trick. All you have to do is press the arrow key once, then move the mouse, move it around, and you’ll eventually see your window. It’s a weird situation to be in, but this is a way to solve it.
Alright, now here’s another solution to the exact same problem. This one is actually simpler to execute, but will actually re-arrange the positions of all the windows you have open on Windows. So, it’s not generally something that I recommend, but if you want a really fast fix, this’ll do it. So what I would do is right-click the taskbar, then here, I’m interested in the “Cascade windows” option, visible here. When selected, cascade windows is gonna make all windows appear, in this fashion, like a deck of cards, stacked. Like if I actually click past here, I can find the window that was stuck offscreen. So this could be a handy one-click solution, but prepare to re-organize your windows.
In this video, I’ll be showing you how to open multiple instances of Notepad++. That is, multiple windows. By default, when you double-click on the shortcut, you’ll get one window. Double-click again, still one window. The reason is of course that there are tabs, so the program doesn’t the logic in opening multiple copies of itself. But of course there are cases where this could be useful.
In this particular case, I have two files, list a, list b. To view one, I have to hide the other, so naturally, there is a benefit to having both open at the same time, and I might actually want that. To get that done, I simply need to click Run, and select the option “Open in another instance”. That will pop open another Notepad++ instance, another window, that is. But… it does give me a weird prompt, it says “Create new file”, Notepad++ list doesn’t exist, it’s, gon – whatever it says, just click No.
Okay. So now it’s kinda tricky visually, but there are two windows. So if I drag this away, you’ll see, hey, there’s actually two. Now, the next step involves dragging – you can either open a file straight through here, just like I did before in the other instance, or you can actually drag the tab, so left-click hold and move the tab into the other instance of Notepad++, and, drop it. And then when you visit that instance, there’s your file. And then you can do cool stuff like Windows 10 the ability to snap windows, you can like drag this one here, and then select this one here, and there you go, list a, list b, you can compare them very easily.
So this is one you can do when you’re just running Notepad++ already. Now, let’s say you didn’t have it open already. Or let’s say you need these windows to open separately all the time. Well, there is a way around that. It’s a bit trickier, I’ll show you that now. Quite simply, you have to be aware of this particular command: multiInst. Now, don’t worry, this is actually a one-time fix. So notice how there’s a Notepad++ shortcut on my desktop. Alright, let’s say I wanted to transform the shortcut to actually have multiple instances, which is what this multiInst thing means, multiple windows. Okay. So to do that, I would right-click this, select properties, okay. And in here, notice how it says “Target”? I’m gonna just zoom this in for you guys. So there’s some text there. You don’t need to pay attention to exactly all of it here, all you need to know is that at the end here, you have to copy this text, and you have to put a space after the quote, and then paste the text. I’ll show that up close. There you go. So “exe”, quote, space, -multiInst. Okay, now you click Apply, click OK.
Alright. So, the next time you use the shortcut, it pops open Notepad++. Use it again, another Notepad++. And again, another one. So, if you’re into that, this is a good way to have that happen. Now, what if you wanted both? Instead of actually modifying the shortcut you already had, you could have simply made a copy, so, ctrl c, ctrl v, and you could have done it to this shortcut instead, and then kept the normal shortcut around.
Hello everybody. In this video I’ll be showing you how to clear up hard drive space. So we’ve all been in this situation, we accumulate too many files and we need to clear up some space so we’re able to install whatever, install a game, install some software. I’ll be showing what I typically do to clear up space. Now the most basic thing you can do is if you’re aware of where the largest files are on your drive you just manually go to them and delete them using Windows Explorer. But let’s assume you don’t know that.
There’s a few things you can do. Even though I’m using Windows 10, most versions of Windows that are fairly recent have this particular feature. If you right click on a drive and go to Properties, you’ll notice that there’s a disk cleanup button… right here. So what this button does is it has this automated process that’s gonna figure out how much space you can free on that drive. And it has a number of techniques for that. So if you look right here, Setup Log Files, Downloaded Program Files, and it tells you what the worth is of each of those. What the weight is of each of those. Right now I’m seeing nothing substantial, but if I wanted to use this, I’d have to check the relevant boxes and click OK. It’s that simple.
Another trick as of Windows 10 is the Storage feature, so if you go to the start menu here and type storage and press enter, you’ll see this nifty little tool. And if you click on the drive that’s concerning you at the moment, it’s gonna start calculating stuff, now, this is definitely a step up from previous versions of Windows. It’s not perfect, though, and I’ll be showing you a tool that’s way better than this, but at least for now this is a pretty cool spot to go and figure out what the main offenders are. At the moment, you can see it’s calculating, but when it’s done calculating, as you can see, it gives you an idea… okay, so green is apps & games, alright, which means that they’re taking up that much space. And red is … other people. So files that are owned by other people. So you can actually explore this particular tool and learn more about what’s taking up space on your computer. Here’s an example, but I won’t go through this right now. Also, notice you can sort by size… very useful. So that’s another thing you can do. But, let me show you a way to visualize all the space on your computer, whether it’s in a folder, or in the drive as a whole. It’s a very very nifty tool, check it out.
This tool is called WinDirStat. Win D I R Stat. I’m gonna put a link in the description of course. So when it first pops up you can choose what it is you want to actually analyze, in this case I care about the C drive as a whole. Click OK, and it’s gonna start working – see the little PacMan doing some stuff up there? You gotta get this tool just work endlessly and at a certain point it’s gonna have tons of data for you to analyze.
Alright, we’re back guys. So if you look here there’s a certain amount of data that’s shown here. I’m just gonna maximize so you see the most possible. Alright. Now, what is this? Now this is the beauty of WinDirStat… these huge squares everywhere. Now here’s the concept. The square size is relative to the size of the file, so the larger the square, the bigger the file. So if you wanna go target the things that are wasting the most space on your drive, you click on the big squares. The only thing to keep in mind is that there are… like, this shows you everything, including system files. You don’t want to be deleting stuff wrecklessly, so you have to use a certain amount of thought, and I would recommend googling pretty much everything before you delete it. But I can tell you for example, if you look at this green square right here, this is, and if you look above, you’ll see the file that’s highlighted, that means that it’s the file that I selected in the squares. So it’s selecting hiberfil.sys. That’s the hibernation file used by Windows, you don’t want to delete that. Same thing with pagefil.sys. Now a good hint of this is if you go and check out the top right, it says system files are green. Okay. So that means the green ones you can kinda just ignore them, because Windows needs stuff to run, and you don’t want to wreck the way works. Now, another big tip is if you actually click on the Windows folder, you see over here, top right? Windows folder. So if I click it, notice that there’s a white outline around this entire group of squares. What this means is that entire folder is Windows, I don’t want to touch that. If I delete anything in there I might mess up my Windows, so I’m not touching that. So my goal is now, you know, my task has now been simplified. All this, forget it. Page files, forget it.
So let’s start analyzing a little bit here. Okay, what is big? This. What’s this? Replay.pbf… okay. So if I zoom up here, we see that Matt, another user on this computer has DiRT 3 installed. Replay.pbf. Now, I am Matt in real life so I can tell you that I don’t have DiRT installed, so something is up there. So this is a hint for me to either uninstall DiRT 3 properly, or clean up the files on my hard drive. That’s gonna save me 1.9 gigs, it’s visible right there. Ok? So I won’t delete it from here, because if I can trigger an installer, I will, that’s always the cleanest way. But at least now I have this info to exploit.
Now there’s more squares, so we click here, hm, ok. Top left, you can see Nvidia corporation, you can also see it at the bottom, I should mention. You see at the bottom there? Hold on I’ll show you right now. CplSetupInt… my mouse is not working but anyway you see what I mean. In the status bar in the window, there it is, bottom left. You can also see when you’re hovering on files, it shows you that.
So the idea is, NVIDIA corporation downloader, why do I have so many? And each of them are 370, suggests to me that perhaps the old updates for my video drivers have been sticking around for no reason, so I can probably delete those. I would of course double-check the version of my video drivers and validate that the ones in that folder are old and that I can delete them properly.
And you see where this is going. This is really helping you visualize, and to a certain extent, that’s what the storage tool did when we checked it out earlier. I’ll pop it up again, see if it remembers. Yeah, it remembers, see it’s helping! You know, and it’s not as a good as WinDirStat if you ask me, but it’s a definitely a nice step. So I really appreciate that in Windows 10.
So if you keep going, you’ll keep targeting squares, and you’ll see hmm, here’s a 7zip file for Chrome, well, I wouldn’t want to mess with Chrome, I wouldn’t want to screw up Chrome. But before you delete anything, you typically want to Google and figure out what the names of these files are, and see, can I delete this file, online? Google that. Can I delete file named this? You know? And you always play on the side of caution.
So, that’s a nice little trick to free up some space. And you can use this to free up space not only on the entire drive, but a specific folder, which is particularly useful for things like Google Drive and Dropbox. If you’re running out of space, you just point it in those folder, at those folders, and it will analyze and it will show you all the squares. And you know there’s no Windows in there, so everything you’re seeing is in fact taking up space in your Dropbox or Google Drive folder. So definitely a very useful trick for clearing up space.
Anyway, so that’s it guys, those are some tips for you. Some other basic things are, you know, usual suspects are the Downloads folder, when you download stuff via a browser, typically it ends up in the Downloads folder. Let me see if I can show you that real quick. So, the Downloads folder is here, yeah, there you go. ZoomIT and Audacity. So, you typically download files, if it’s programs, you download them, you install them, but you don’t necessarily remember to delete these files. So a good place to delete these files is in the download folder.
And that’s it guys, I hope you find this tool useful – check in the description, you’ll find the link for the program.
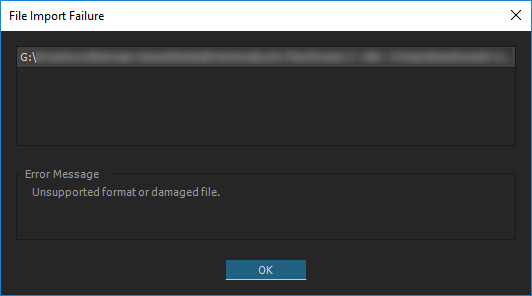
Alright, so here’s a quick problem I just encountered. To record video game footage for my Let’s Play videos, I typically use a nifty little program called Fraps. Natively, Fraps generates video files in the AVI format. Normally, working with these types of files is extremely simple. I drag them into Adobe Premiere, it processes briefly, and bam, they’re ready to be manipulated. But today, for some reason, I got a new dialog after that processing step. The dialog reads “File Import Failure”, and it contains the following error message:
Pretty scary, especially when the recording in question is 58 minutes long, and you don’t quite feel like re-recording it.
Solution
I took to google, as I always do, and I found a particularly useful thread on the Adobe forums. There were a lot of ideas raised, but ultimately, I managed to solve my problem by performing two of them. Here’s what I did:
Step 1: I reinstalled Fraps. To do this, I went on their site, and accessed the “Members Areas” to download the full version (free version should work equally well). Reinstalling was suggested by Sarah Northway in the Adobe thread. Thanks, Sarah!
I had this problem and just had to install Fraps again – it automatically installed the codec I needed then Premiere could once again read the AVI files.
Step 2: I installed FFDShow. I left the default install options, nothing modified. Installing FFDShow was suggested by “hiddenp18268515” in the same thread. Thanks!
If re-installing FRAPS doesn’t work for you, try installing FFDShow. This solved the problem on my machine – Premiere CC 2015 is once again reading Fraps AVI files.
Step 3: I shut down Adobe Premiere, and re-opened it.
That’s it! After that, when I tried importing the same AVI, everything worked as expected. This was a way better solution than re-encoding the file into another format like MP4, which was another idea suggested in that thread. (Don’t get me wrong, it was a really clever idea that likely would have worked, I just wasn’t interested in waiting around for the file to re-encode, let alone adopting that step into my video editing workflow moving forward.)
Another thing: I’m not sure if both steps above needed to be performed. Had I done the shut down, re-open step immediately after Step 1, I might have discovered that it had already solved the problem. But, in any case, this is what worked for me, so I’m happy to share it in case it helps someone else.
Okay, so here’s an interesting issue. Newer versions of PowerPoint have this really simple method for adding YouTube videos to presentations. All you have to do is switch to the “Insert” tab in the ribbon, click “Video,” and then click “Online Video.”
Doing that will make the following dialog appear:
From there, all you have to do is search for a YouTube video. Only public ones can be found, you can’t reference unlisted videos as far as I can tell. So let’s say you selected a video for your presentation, and pressed Insert:
Good. The video appears in your PowerPoint presentation, and it can be played whenever you switch to the “Slide Show” view.
However, if you decide you’re ready to present, and you activate PowerPoint’s presenter view, you will encounter an interesting problem when you get to the video, and try to click play. Either nothing will happen, or your left-click attempt will be interpreted as “next page,” moving PowerPoint to the next slide. This, is no good – what’s the use of having a video in your presentation if you can’t actually make it play for your audience while you’re presenting?
It’s perplexing that such a bug (in my opinion) exists in PowerPoint. When I originally encountered the issue, I took to a Google with a passion… surely, I would find a solution to the problem.
Unfortunately, my googling left me more discouraged than anything. I saw some signs of people have the same issue, but couldn’t find an article dealing specifically with the problem I had encountered.
Solution
Thankfully, after playing around with PowerPoint, I found a way around the issue. It’s not perfect, but it does allow the person presenting to trigger the YouTube video without switching back into normal view, then into slide show.
In the presenter view, look for the “Display Settings” menu at the top.
Left-click that, and select “Duplicate Slide Show”.
Basically, this makes it so what you see is exactly what the audience sees. For some reason, in this mode, PowerPoint will allow you play YouTube videos.
It’s frustrating to have to leave the presenter view, but at least your audience will be able to experience the presentation exactly as it was meant. Hopefully this will help some of you; however, if you find a better solution, please don’t hesitate to share it below.
As with most software, it is generally known that keeping WordPress up-to-date is a wise idea, a best practice. With each release, the platform performs better, gets more secure, introduces new features – put simply, it gets more awesome (scientific term). But, in this quest for awesome, one must be cautious. Updating WordPress, or even its plugins, may have unintended side-effects. If you’re a hobbyist, running a small site, it’s probably not a huge deal. If you’re using WordPress for your business practices, a hiccup can prevent people from doing their jobs properly, and that’s bad for all involved.
Today, as part of my regular tasks with one of my clients, I started updating plugins. One of the ones I updated was Events Manager, which was updated from 5.6.1 to 5.6.2. Soon after the update, a co-worker noticed a side-effect. Though not critical, the update somehow conflicted with another plugin that was related. Wanting to avoid this side-effect, I immediately sought to roll back to the previous version. Before actually retrieving a backup, it occurred to me… surely, there must be a way to get the old version online. So I went to Event Manager’s page in WordPress’ plugin repository.
There’s a big button that lets me download the latest version, 5.6.2, but what about previous versions? I checked the “Changelog” section, which I knew would feature references to prior versions, but, as I seemed to recall, there was no link available.
Solution
I quickly took my search to Google, where I found an article that suggested a clever solution:
All you have to do is copy the download url to your clipboard. Then modify that url to have the version number you want.
What? Could it be that easy? In my browser, Google Chrome, I right-clicked the big orange download button, and clicked “Copy link address”:
Then, I pasted the link in a Notepad, so I could see and potentially change it. If you’re doing this right now, reading this article, the solution may differ depending what you get after pasting the link address. Simply refer to the scenario below that better reflects what you see:
A) The version number is visible in the link address.
If you can see the version number in the filename, you’re set.
Then, copy that new link into your browser, press enter, and bam, old version downloaded. Upload via FTP, and you’ve successfully time traveled (kind of).
B) The version number is NOT visible in the link address.
(Notice the “.” right before the version number, it’s important.)
After writing in the version number, all you have to do is paste the link in browser, press enter, and there you have it, the old version downloaded. Yet again, upload via FTP, and you’re set.
Considering how easy this was to do, I wonder why WordPress’s plugin site didn’t natively support us downloading whichever we wanted. I’m not sure if this is their way of discouraging rollbacks, or whether they just never took the time to add the functionality. Either way, many thanks to the author of the article!
UPDATE: As of November 25, 2016, I have a video tutorial for this. The written post continues below.
Internet Explorer has matured quite a bit since the release and subsequent infamy of its 6th version, IE6. Over the years, Microsoft has made many changes to the way the browser works, and overall, I’d say they’ve been successful in delivering a better browsing experience. However, they’ve also formalized certain parts of its configuration, and as a side-effect, it’s not always easy to make changes that are fairly straight-forward in one’s mind. A good example of this is changing the default search engine that’s used by the address bar.
When IE is first installed, it comes with Bing pre-configured as the only search engine, which should come as no surprise since Bing is Microsoft’s own search solution, a rival to Google. (Note: It’s possible that in my case, I had Bing pre-installed because I skipped the setup wizard when first installing Internet Explorer, so they reverted to the default settings.) However, as much as Microsoft loves to promote its own solutions, it’s fairly safe to say that Google’s the most commonly used search engine. So, naturally, it’s fairly normal for people to ask themselves how to remove Bing, and restore Google as the one go-to engine within Internet Explorer. If that’s what you’re looking to do, follow the steps:
Steps
Click on the gear icon to the top right in the main Internet Explorer window.
In the menu that appears, click “Manage add-ons.”
In the “Manage Add-ons” dialog, locate the “Add-on Types” section to the left, and click “Search Providers.”
At this point, you should see the list of installed search providers on the right. In my case, I only saw Bing. From this point on, depending on whether or not you see Google, the steps will be different.
If you don’t see Google in the list:
In the “Search Providers” section of the “Manage Add-ons” dialog, look for a link called “Find more search providers…” it should be to the bottom left. Click it.
A website called the “Internet Explorer Gallery” should appear, and on it, you’ll see many popular search providers. Click on the title that represents Google.
In the “Add Search Provider” dialog that appears, check the box that says “Make this my default search provider.” (If you also want Google to suggest websites to you when you’re typing in the address box, you can check the “Use search suggestions from this provider” box too.) Then, click “Add.”
If you have the “Manage Add-ons” window open, close it.
Close Internet Explorer, and re-launch it. (This is just to be safe. A friend of mine had to do this recently, even though it shouldn’t be necessary.)
Google should now be your default search engine – try by typing in the address bar for a search term, and pressing Enter.
If you do see Google in the list:
Right-click “Google,” and click “Set as default.”
Click “Close.”
Close Internet Explorer, and re-launch it. (This is just to be safe. A friend of mine had to do this recently, even though it shouldn’t be necessary.)
And that’s all there is to it. It’s a bit more involved than it needs to be, especially if you don’t have Google in your list, but Microsoft has a way of formalizing things, in general. In terms of development, in my opinion, generalizing the concept of a “search provider” so that it’s a type of “add-on” is actually a healthy practice, I just feel they could have been done better from a user interface perspective.
As a devout user of Google Chrome, I was surprised to discover that all of a sudden, I couldn’t install any extensions. The developer in me (who communicates in binary, by the way) knew that it was probably a permission-related issue that had something to do with my download folder. But, being a creature with many other things to do, I avoided the problem for a while – I had other things to deal with. That is, until today, when I really wanted it to work. So, here’s the error message as I saw it:
Solution
And here’s how I solved it.
I clicked on Chrome’s menu button – the three gray line icon to the right of the address field.
Then I clicked “Settings.”
In the “Settings” page, I searched for “download directory.”
Then, I looked at the path set as my download directory, and realized what my error was:
To solve the problem, I simply had to change it to use a location that was always available and connected. In the end, it wasn’t as tricky as a permission issue, which I appreciated – but keep in mind, even with permission issues, changing the folder may resolve the issue, depending on the change you’re making. But in the end, my goal here is to simply share my solution so you know how to potentially fix the problem.
As I was working with WordPress today, I happened to stumble into a webmaster’s horror scenario. It all started when I noticed that some of my plugins were out of date. In an effort to correct this, I selected all outdated plugins, and then clicked the handy little “Update plugins” button. Instead of seeing the progress messages, I was greeted by this:
It was the timing of the Internal Server error that made me uneasy – did the upgrade process have time to complete? Any interruption could potentially result in database corruption, so I launched another window and tried to see if everything was working normally. Here’s what I saw:
Even after a few refreshes, that message remained – which meant that WordPress switched to maintenance mode for the upgrade progress, but since it was interrupted by the crash, it never had the opportunity to disable it. In an attempt to assist, I tried to access the admin interface, only to get the same message. Seeing as I had a minor WordPress apocalypse to deal with, I wondered how I was supposed to repair it.
I noticed a strange file in the root of the site called .maintenance. The date stamp was just minutes old, so I deleted it and VOILA, the site was back to normal. So, if you are unable to load WordPress because it’s stuck in Maintenance mode, just FTP into the root directory and delete the .maintenance file.
Good catch, John, and thanks for ending my miniature webmaster crisis.
I’m hoping that the guys at WordPress find a better way to handle cases like these, as the current approach seems somewhat dated. If they were informing administrators before every update, then there wouldn’t be problem. As it stands, victims will either have to search for a solution online, or do some investigating – both of which increase downtime. Please, WordPress… help us keep these horror scenes short.
A few months ago, my Windows installation became corrupt, and despite my best efforts, I had to format the hard drive. I’m the type of guy that makes a whole lot of backups, so I proceeded to format with confidence. I did, of course, make a few last minute exports just in case. Unfortunately, I didn’t realize that there was something wrong with one of the most important items on my checklist: my primary Subversion (SVN) repository. To my surprise, the backups only included the revisions that occurred prior to November 2011. While horrifying, I remembered that I at least had the live version of my working directory.
Unfortunately, I turns out I didn’t. Something strange happened to that directory – all files had disappeared from the root, and only sub-directories (and their contents) survived. It had been a while since I worked on the project, so I didn’t realize that this had happened. My automated backup procedure was therefore copying a broken directory, without my knowledge. Once my panic settled, I began to calculate exactly how much work I lost. Thanks to the remaining sub-directories, I was able to recover parts of certain changes, instead of losing them completely. In the end, I lost approximately 25 hours of work – which thankfully wasn’t much compared to the overall effort that went into the project.
Interestingly, I had previously formatted my drive in November 2011; however, when I imported my repository, it all seemed to be working fine. I was able to commit, revert, and even view the log of revisions through TortoiseSVN. Put simply, the process was so smooth that I felt confident in the procedure – and I had never seen any indication that something was wrong. While I still don’t know what caused the problem, I believe TortoiseSVN might have been related. I recall that the version changed, and I was importing my data into a new version, rather than the same. Until I figure out why exactly why this happened, I’ve taken steps to ensure I am prepared for future disaster scenarios. How have I done this?
Solution
With backups, lots of backups. I created batch file that would handle backing up my repository. It creates three types of backups every time it is executed, including:
Dump the contents of the filesystem […] in a “dump file” portable format.
While this command allows for incremental backups, and selecting only a subset of revisions – I’m using it to export all revisions, as a full backup. Excessive? Yes, it most certainly is – but I’d rather not have a repeat of the previous experience.
Due to the excessive nature of this command, the script uses 7-Zip to reduce the resulting dump size.
3. A copy of the working directory.
Just a simple xcopy; the idea is to ensure that I at least have the latest version of the code, if everything else fails.
For now, the script is working well – but I’ll likely run a few more tests to ensure that the backups are truly reliable. Since they’re created by interacting with SVN directly, rather than going through TortoiseSVN, I’m more confident that they can be trusted. In the meantime, I figured some of you might find it useful.
Also, instead of executing the script via Windows Scheduler, I decided to put it in my taskbar instead. It wasn’t as easy as I originally thought, so feel free to read the following blog post for an explanation: